
Table of Contents
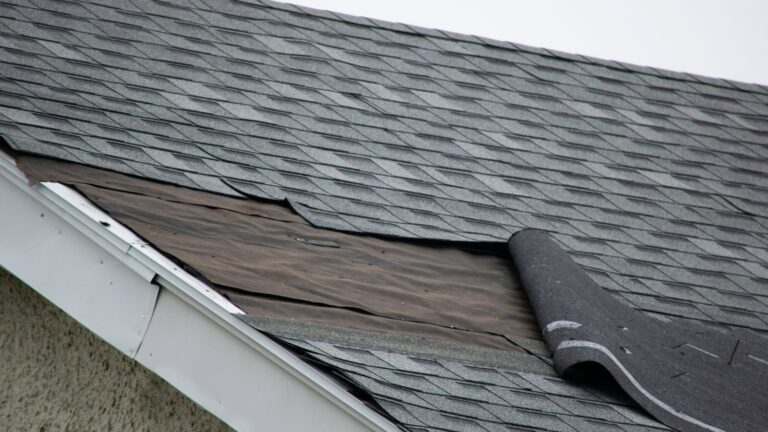
ToggleImagine a burst pipe flooding your basement at 2 a.m., or a client discovering water spraying behind the walls during a renovation. In these moments, knowing where your water shut off valve lives can mean the difference between a controlled situation and thousands in damage. Every home has a main water shut off valve, the master switch that stops water flow to your entire house. Yet most homeowners couldn’t find theirs if asked. This guide walks you through locating your valve, understanding the types you might encounter, and using it correctly when an emergency strikes. It’s not complicated, but it matters.
Key Takeaways
- A house water shut off valve is your first line of defense against costly water damage, allowing you to stop water flow to your entire home in seconds during emergencies.
- Most main shut off valves are located in the basement near the foundation wall where the water line enters your home, though some homes have external valves near the property line.
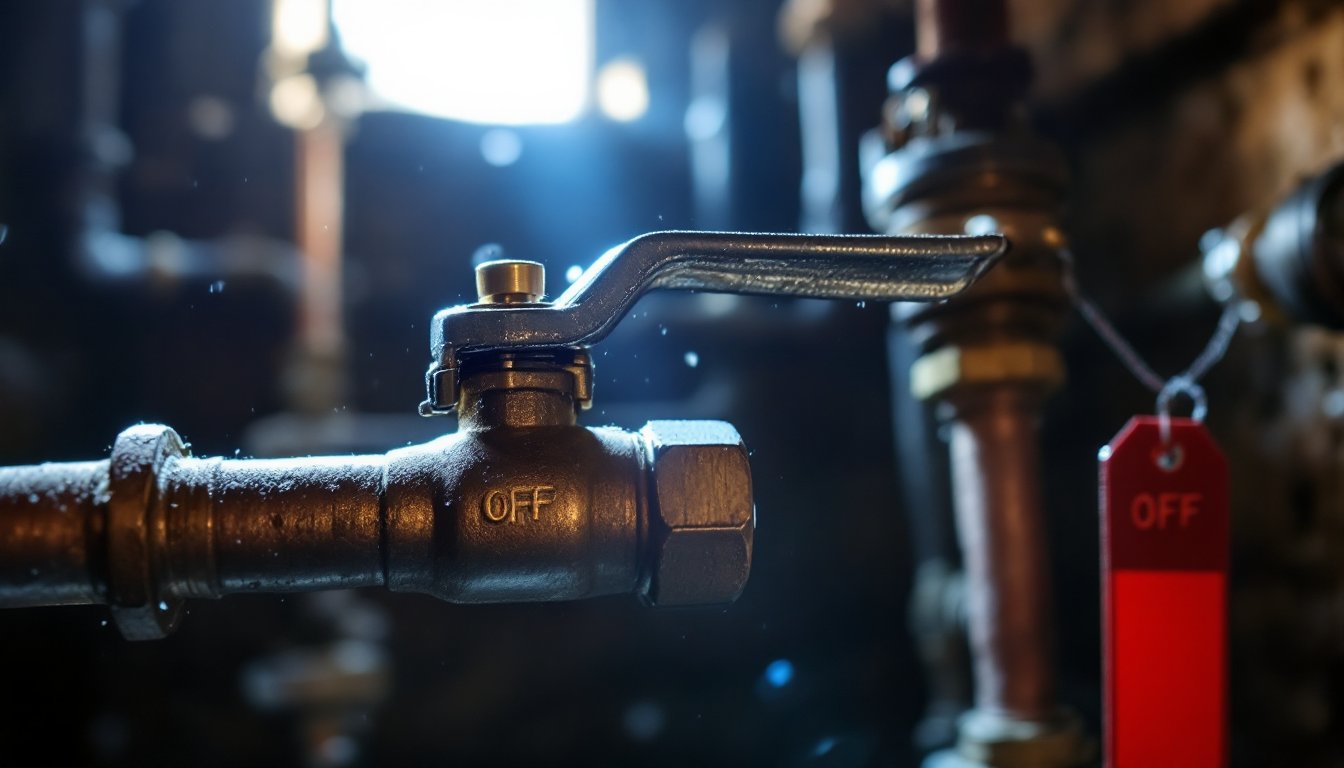
- Ball valves are the modern standard with a simple 90-degree lever handle, while older gate valves with wheel handles are prone to sticking and should be replaced.
- Test your water shut off valve quarterly with a gentle quarter-turn to ensure it operates smoothly, and never force a stuck valve as this can damage the mechanism.
- In an emergency, quickly shut off the valve, test an upper-floor faucet to confirm water flow has stopped, and then call a licensed plumber to fix the underlying problem.
- Hard water and high-pressure systems stress valves over time, so consider installing a pressure regulator or whole-house filter to extend your valve’s lifespan and reliability.
Why Every Homeowner Needs to Know About Their Water Shut Off Valve
Water damage is one of the costliest homeowner claims, and prevention starts with a simple skill: turning off the water. A burst pipe, failed water heater, or ruptured washing machine hose can flood a home in minutes if you don’t act fast. Having immediate access to your shut off valve prevents cascading damage while you call a plumber.
Beyond emergencies, knowing your valve’s location helps with routine maintenance. When you’re working on plumbing fixtures, replacing a toilet, installing a new faucet, or fixing a leak under the sink, you’ll often need to stop the water supply to that specific area. Understanding how your main shut off valve works and where branch valves are located saves you the frustration of draining your entire system when you only need to service one fixture.
Take the time now, before you need it. Walk through your home with a flashlight, locate your valve, make sure it operates smoothly, and tell your family where it is. That five minutes of prep work could save you tens of thousands in water damage repair.
Where to Find Your Main Water Shut Off Valve
Your main shut off valve is where your water line enters your home from the municipal supply (or well system). Finding it requires checking a few standard locations. Start by examining your water meter, it’s usually near where the supply line enters your property. The main valve is often located just inside your home near that entry point.
Common Locations Inside Your Home
In many homes, the main shut off valve sits in the basement near the foundation wall. Look along the exterior walls, particularly where you see the incoming water line. The valve typically appears as a lever or wheel-shaped handle attached to a copper or PVC pipe. In warmer climates without basements, check crawl spaces, utility rooms, or the space under the kitchen sink, though these locations are less common for the main valve.
In older homes, the valve might be buried under insulation, behind boxes, or obscured by stored items. Get a flashlight and trace the water meter line backward into the house. If your home was built before 1980, the valve may be a brass gate valve (an older, less reliable design). Newer homes typically have ball valves, which are easier to operate and less prone to seizing.
Don’t confuse the main shut off with branch valves. You may see multiple valves near your water heater, washing machine, or toilet, these control individual fixtures or zones. The main shut off controls everything.
External Shut Off Valve Locations
Many municipalities require a secondary shut off valve outside the home, typically near the property line or buried in a box at street level. In cold climates, this external valve allows homeowners to shut off water before the main line freezes during winter. Look for a small rectangular box, usually made of plastic or concrete, flush with or slightly above the ground in your front yard.
To locate it, check your property survey or water bill, some utilities mark the location. If you find it, remove the cover and look inside. You’ll see the valve mechanism (often a turn-key or lever) and the water line. Some homes have both internal and external valves: knowing about both is helpful. The external valve is particularly important in northern climates where winterization is necessary.
Understanding Different Types of Water Shut Off Valves
Not all shut off valves operate the same way, and knowing which type you have affects how you use it.
Ball Valves are the modern standard and the easiest to use. They have a lever handle that rotates 90 degrees, parallel to the pipe means “on,” perpendicular means “off.” You can operate a ball valve with one finger, and you’ll get tactile feedback when it’s fully closed. If you’re installing a new main shut off or upgrading an old one, go with a ball valve.
Gate Valves are older, wedge-operated designs with a circular wheel handle. Turning the wheel raises or lowers a metal gate inside the pipe to stop flow. These valves take multiple turns to fully close and are prone to sticking if not operated regularly. Many plumbers discourage their use as a main shut off because they seize up over time, especially if left unused for years.
Needle Valves and Stop Valves are small, fine-adjustment valves you’ll find on individual fixtures like toilets and sink supplies. They’re not suitable for shutting off your entire home’s water: they’re made for precision control of single appliances.
When you locate your main valve, test it now. Gently turn or pull the handle to make sure it moves. If it’s stuck, don’t force it, call a plumber to clean and service it. A valve that won’t operate in an emergency is as good as no valve at all. Annual testing (a slight turn, no need to fully close) keeps it responsive.
How to Turn Off Your Water in an Emergency
When a pipe ruptures or a fitting fails, staying calm and acting quickly minimizes damage. Here’s what to do:
Step 1: Alert Everyone. If you live with others, shout or send a quick message to shut off the water immediately. This prevents anyone from turning on a faucet and worsening the flow.
Step 2: Locate Your Main Valve. If you’ve already done the prep work mentioned earlier, you’ll go straight to it. If not, head to your basement, crawl space, or utility room and trace the incoming water line. Look for the meter and follow the line into your home.
Step 3: Turn Off the Valve. For a ball valve, turn the handle perpendicular to the pipe. For a gate valve, turn the wheel counterclockwise until it stops, don’t over-tighten. You should feel a definite stop, not a hard resistance.
Step 4: Test the System. Go to an upper-floor faucet and turn it on. Water should stop flowing within seconds. If it trickles, the valve didn’t seat fully: return and check it.
Step 5: Call for Help. Now that you’ve stopped the damage, call a licensed plumber to assess the leak. Don’t turn the water back on until the problem is fixed.
If your main valve won’t turn or you can’t find it, your external valve (if present) becomes critical. Locate that box outside and use the secondary shut off. This is why knowing both locations matters. In a true emergency with no access to either valve, contact your municipal water department, they can shut off supply at the meter or street.
Maintenance Tips to Keep Your Valve Functioning Properly
A shut off valve sitting unused for years will often freeze in place, making it useless in an emergency. Regular, gentle maintenance keeps yours responsive and reliable.
Quarterly Testing. Turn your main valve’s handle through a quarter turn every three months. This light operation keeps the mechanism from calcifying or corroding. You’re not closing it fully, just checking that it moves freely. If it’s stuck, call a plumber before it becomes a crisis.
Annual Visual Inspection. Look for signs of corrosion, leaks around the valve body, or visible rust on the handle. Copper valves may develop patina (a greenish coating), which is normal. Rust, weeping water, or crystalline buildup around the valve indicate it may need replacement.
Address Sediment Issues. If your valve operates stiffly or you have hard water, mineral deposits may accumulate inside. A professional plumber can clean or rebuild the valve. Some homeowners install a whole-house filter to reduce sediment, which also improves water pressure and appliance longevity.
Don’t Force It. If your valve doesn’t turn smoothly or requires excessive force, stop immediately. Forcing it risks breaking the handle or damaging the internal mechanism. Call a plumber instead, replacement is cheaper than an emergency repair when the valve fails entirely.
Know Your Water Type. Hard water and high-pressure systems stress valves more. If you have hard water, consider installing a pressure regulator (typically set to 50–80 psi) to extend your valve’s life. Many codes actually require them in new construction for this reason.
When you eventually need to replace your valve, whether from age, corrosion, or malfunction, have a licensed plumber do it. The job involves cutting the main water line and soldering copper fittings (or joining PVC), work that requires proper tools and know-how to avoid leaks. This isn’t a DIY plumbing repair unless you’re experienced with soldering or PVC joinery.
Know Your Valve Before You Need It
Your water shut off valve is one of those home systems that lives in the background until it matters desperately. Take an afternoon to find yours, test it, and teach your family where it is. Locate your main valve, understand whether you have a ball valve or gate valve, and mark it clearly so there’s no confusion during a crisis. If your valve is old, stuck, or you’re unsure about its condition, call a plumber for a quick inspection. That small investment in time and knowledge now could protect your home from thousands in water damage. When the emergency comes, and in most homes, it eventually does, you’ll be ready.