
Table of Contents
ToggleBuilding a tiny house bar brings intentionality to home entertaining, turning a small corner into a functional gathering spot. Whether you’re working with a few square feet in a studio or carving out a dedicated nook in a tiny home, a compact bar doesn’t require tons of space, it requires smart design. A well-built tiny house bar maximizes storage, looks polished, and handles the essentials: mixing drinks, stashing glasses, and keeping spirits organized. This guide walks you through the fundamentals of designing and building a custom bar that fits your space, skill level, and entertaining style.
Key Takeaways
- A tiny house bar combines functionality and style by centralizing drinkware and glassware in a dedicated space while saving $500–$1,700 compared to purchasing pre-made bar units.
- Smart storage design—mixing open shelving for display with closed cabinetry below—maximizes limited square footage and keeps a tiny house bar both accessible and organized.
- Standard bar dimensions require only 36–48 inches of width, 18–24 inches of depth, and 36 inches of clearance in front, making a tiny house bar feasible even in studio apartments or small corners.
- A DIY tiny house bar project costs $300–$800 with plywood, lumber, shelving, and basic tools like a drill, miter saw, and level, plus achieves a custom design no store-bought unit offers.
- Proper finishing—priming, applying water-resistant sealant, and using semi-gloss paint—protects your tiny house bar from spills and extends durability in high-use entertaining spaces.
- Wall-mounted shelves and vertical organization multiply storage capacity without expanding your footprint, allowing bottle collections to grow while maintaining an intentional design aesthetic.
Why a Tiny House Bar Is the Perfect Home Addition
A tiny house bar serves as both a functional workspace and a social hub. Instead of cluttering your kitchen with drinkware and bottles scattered across countertops, a dedicated bar centralizes everything and keeps your living area cleaner. It’s also a genuine conversation starter when friends visit, a built-in bar signals that you’re serious about hospitality without needing a sprawling room.
From a design standpoint, a compact bar lets you express style in a defined footprint. You’re choosing materials, finishes, and layouts intentionally, rather than default kitchen cabinetry. Even a simple corner setup with open shelving and a small counter becomes a feature that guests notice and remember. The project also improves everyday living: morning coffee setup, quick snack prep, or a place to sort glassware and barware.
Building it yourself cuts costs significantly. A finished bar cabinet or commercial under-counter unit can run $800–$2,500 depending on finish and features. A DIY version, with decent materials and some careful joinery, typically costs $300–$800. You also gain the satisfaction of crafting something custom that no one else has.
Essential Design Considerations Before You Start
Space Planning and Layout
Before cutting a single board, measure and sketch your space carefully. A functional bar doesn’t need much: a work surface between 36 and 48 inches wide, a counter depth of 18 to 24 inches, and standing clearance of at least 36 inches in front of it so people can move comfortably. If space is truly minimal, even a wall-mounted fold-down counter works.
Consider sight lines and traffic flow. Your bar shouldn’t block doorways or create an awkward traffic jam during gatherings. If it’s a corner setup, leaving at least one open side helps people mingle without feeling trapped. Think about whether it’s a social bar, visible and open, or a prep station tucked into a pantry or galley kitchen. That choice affects what finishes and storage styles make sense.
Height matters, too. A standard bar top sits 36 inches above the floor: bar-height stools are 24 to 26 inches tall. If you’re integrating into existing cabinetry or shelving, verify existing heights before designing.
Storage Solutions and Organization
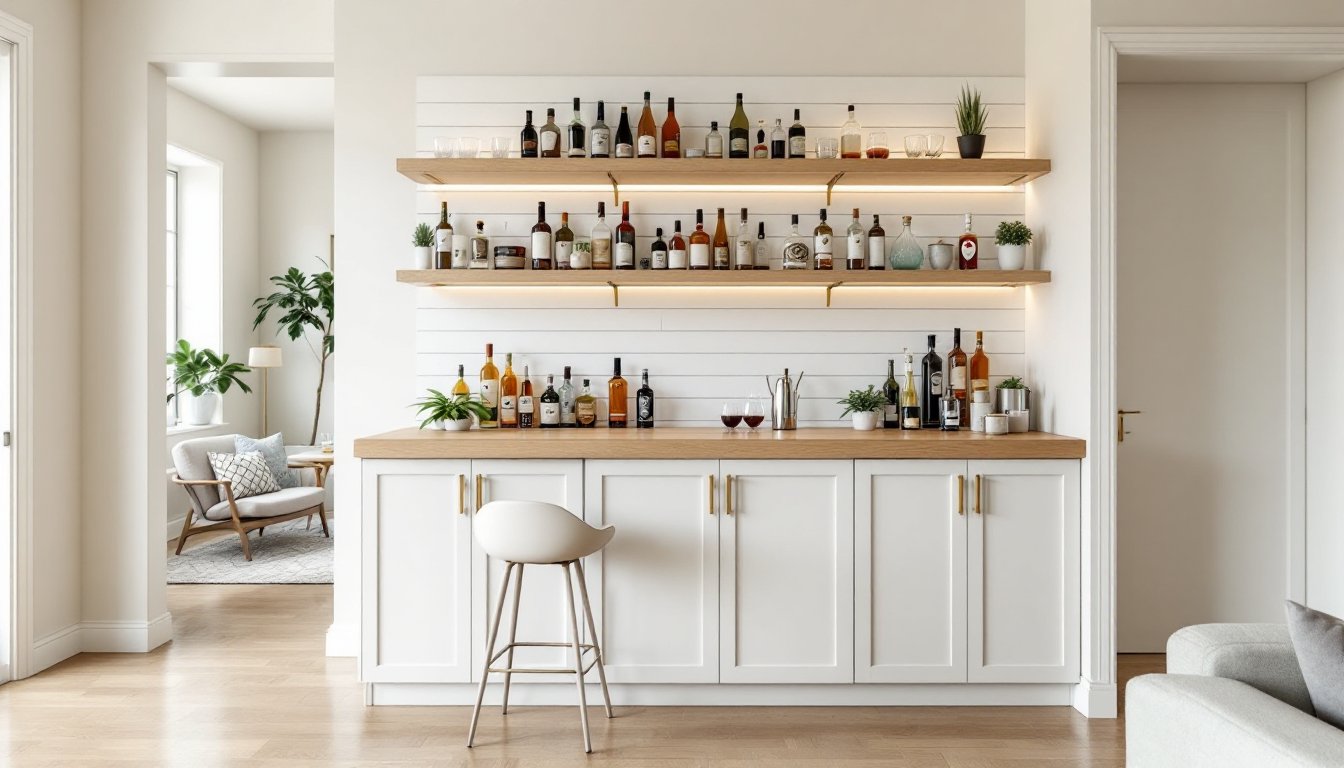
Tiny space demands smart storage. Open shelving looks bright and accessible: closed cabinetry hides clutter but eats visual space. Many successful tiny house bars mix both: closed storage below (for spirits, excess glassware, supplies) and open shelves above (for display bottles and used glassware). This layering is honest about what you’re storing and what you want visible.
Think vertically. Wall-mounted shelves above the bar counter multiply storage without expanding footprint. Using adjustable shelving lets you swap shelf spacing as your glassware collection grows. Pegboard sections or a narrow wall-hung cabinet with hooks keeps bar tools (jiggers, strainers, muddlers, pour spouts) organized and within arm’s reach.
Bottle storage depends on collection size. A small bar might fit 12–20 bottles: larger collections need systematic shelving or a wine fridge. Open display works if bottles are attractive and rotated regularly: otherwise, closed cabinets keep dust and light off spirits. Features like IKEA’s customizable shelving systems offer low-cost modularity, many DIYers adapt wall-mounted units for bar storage by adjusting shelf depth and adding a countertop overlay.
Building Your Tiny House Bar: Step-by-Step Instructions
Materials and Tools You’ll Need
Materials:
- Base cabinetry (ready-made, modified, or built-from-scratch): 3/4″ plywood, 2×4 framing lumber, or store-bought cabinet boxes (IKEA, home center basics)
- Counter top: 3/4″ hardwood plywood, solid wood edge-banding, laminate, or reclaimed wood (3–6 feet × 18–24 inches)
- Shelving: 3/4″ hardwood plywood or solid boards, adjustable shelf pins or shelf brackets
- Back panel (optional but recommended): 1/2″ plywood, shiplap, or hardboard for water and stain resistance
- Finish: Wood primer, paint or stain, polyurethane or food-safe sealant
- Hardware: L-brackets, shelf brackets, screws (2.5″ for framing, 1.25″ for plywood), nails, adjustable feet or leveling pads
Tools:
- Miter saw or circular saw with straightedge guide (cutting lumber and panels cleanly)
- Drill-driver with bits
- Kreg jig (pocket-hole joinery, makes assembly quicker and hides fasteners)
- Level (essential for countertop and shelf alignment)
- Measuring tape, combination square, pencil
- Orbital sander (120 and 180 grit) and sanding block for prep
- Table saw or rip guide for ripping plywood
- Clamps (2–4 helpful for assembly and glue-up)
Safety gear: Safety glasses, dust mask (especially with plywood), work gloves, hearing protection if using power tools for extended periods.
Construction and Assembly Process
1. Build or source the base.
If starting from scratch, a simple frame uses 2×4 lumber for vertical supports and horizontal rails. Typical dimensions: two vertical 2×4 supports set 48 inches apart (counter width), connected front-to-back with 2×4 cross-members at 18 inches deep, with a bottom rail 6–8 inches from the floor (for toe kick clearance). Use 2.5-inch pocket-hole screws or 3-inch exterior screws at frame joints, pocket holes hide fasteners on the finished side.
Alternatively, modify an existing cabinet base or buy unfinished cabinetry from a home center and customize the top and sides. Pre-made saves time but offers less control over proportions.
2. Install a water-resistant back panel.
A back splash or back panel protects walls from spills and serves as a finished backdrop. Use 1/2-inch plywood primed and painted, or reclaimed shiplap for character. Mount it to wall studs with 2.5-inch drywall screws set every 16 inches. Leave a small gap (1/4 inch) at the top and bottom for air circulation and to avoid trapping moisture. Projects often skip this step to save time, but it’s worth the effort for durability and polish.
3. Prepare and attach the countertop.
If using 3/4-inch plywood, seal the edges with solid wood edge-banding (iron-on or contact cement) to hide the plies. Sand to 120 grit, then 180 grit, for a smooth finish. Apply a food-safe primer and two coats of polyurethane or a water-resistant stain-and-seal combo. Let cure fully (24–48 hours) before install.
Secure the top to the base using figure-8 fasteners or pocket screws on the inside, never glue a hardwood top to the base, as seasonal wood movement will cause cracking. Leave a 10–12 inch overhang on the front for knee clearance and a comfortable seated bar height.
4. Add shelving.
If hanging shelves on the wall, locate studs with a stud finder and use 3/8-inch lag bolts or heavy-duty shelf brackets rated for at least 50 pounds per shelf. Space shelves 12 to 15 inches apart vertically (adjust for bottle height). Use a level and mark mounting holes carefully before drilling, misalignment shows immediately.
For shelving above the base cabinet, either run brackets from the top of the cabinet or (if using adjustable pins) drill holes every 2 inches vertically on the inside walls of the cabinet box. Adjustable shelves let you reorganize as your collection grows.
5. Prime, finish, and install hardware.
Sand all surfaces, apply primer (helps topcoat adhesion and hides plywood grain), and finish with paint, stain, or a combination. Two coats are standard: let each dry fully. For bars that see spills, a semi-gloss or satin finish is easier to wipe clean than flat or eggshell.
Install shelf pins, brackets, and any door hardware once finish is dry. Add adjustable feet or leveling pads to the base so you can fine-tune levelness, concrete and old floors are rarely perfectly flat.
Real-world tip: Many DIYers source inspiration from Scandinavian tiny home designs, which favor minimalist bars with clean lines, pale finishes, and integrated shelving. That aesthetic works especially well in small spaces because it doesn’t visually crowd. For advanced joinery techniques, dados, mortise-and-tenon, or shaker-style panel doors, Fine Homebuilding offers detailed step-by-step builds that translate to bar cabinetry work.