
Table of Contents
ToggleEvery homeowner should know one critical fact: when a pipe bursts, you have minutes to prevent thousands of dollars in water damage. The main water shut off valve is your first and most important line of defense in a plumbing emergency. This valve controls all the water flowing into your house, and knowing where it is, and how to use it, can save your home, your belongings, and your sanity. In this guide, we’ll walk through what your main water shut off valve does, where to find it, how to operate it, and how to keep it in working order.
Key Takeaways
- Your main water shut off valve controls all water entering your home and can prevent thousands of dollars in damage during plumbing emergencies when turned off in seconds.
- The main water shut off valve is typically located where the water supply line enters your house—often near the water meter inside (basements, crawlspaces) in cold climates or in exterior meter boxes in warm climates.
- Ball valves require a quarter-turn perpendicular to the pipe, gate valves need clockwise rotation until resistance, and stopcock valves need multiple clockwise turns to fully close your water supply.
- Test your main water shut off valve’s functionality by closing it and checking that no water flows from the lowest faucet in your house to confirm it’s working properly.
- Exercise your main water shut off valve every six months by turning it a full cycle to prevent internal parts from seizing and mineral buildup from freezing the valve shut.
- Locate, label, test, and share your main water shut off valve’s location with family members now—not during an emergency when every second counts.
What Is Your Main Water Shut Off Valve and Why It Matters
Your main water shut off valve is a control point where the municipal water supply enters your property and transitions into your home’s plumbing system. When you turn this valve, you stop all water flow to every faucet, toilet, shower, and appliance in the house. Think of it as the master switch for your entire water system.
Why does it matter? Imagine you’re away for the weekend and come home to find a burst supply line under your kitchen sink, or a failed water heater connection spraying water across your basement. Without access to your main shut off valve, water will keep flowing until a plumber arrives or the damage becomes catastrophic. With it, you can stop the flow in seconds.
You’ll need to turn off the main valve for major plumbing repairs, winterization in cold climates, extended vacations, or any emergency involving water. It’s also essential if you’re replacing fixtures, repairing hot water heaters, or dealing with a serious leak. Even if you plan to call a professional plumber, knowing how to shut off water yourself prevents panic and limits damage while you wait for help.
Where to Find Your Main Water Shut Off Valve
Finding your main water shut off valve isn’t always straightforward because homes are built in different eras and in different climates, each with its own plumbing conventions. But, the valve is always located where the main supply line enters your house from the street or from a well.
Start by looking for the water meter. In most homes, the shut off valve sits either just before or just after the meter. If you can’t locate it indoors, check outside near the foundation, along the street side, or in a valve box buried in your yard (often marked with a plastic or metal cover). Take a moment now to locate yours and mark it mentally or with a piece of tape, don’t wait until an emergency.
Common Locations in Different Home Types
Homes in cold climates often have the main shut off valve inside the house, typically in the basement, crawlspace, or near the utility room where pipes enter. This placement protects the valve from freezing and allows easy access during winter.
Homes in warm climates sometimes place the valve in an exterior meter box near the street or along the foundation. These boxes prevent unnecessary interior penetrations and are standard in many newer subdivisions. The valve sits inside a small underground or above-ground box that you’ll need to open with a meter wrench or a large adjustable wrench.
Older homes can be unpredictable. Water lines may enter through a basement, crawlspace, or even an outdoor hydrant. If you can’t find it, check with previous owners, your home inspection report, or your municipal water department, they often have records.
Once you locate the valve, trace the supply line backward from it toward where it enters the house or comes up from the ground. This step-by-step guidance on provides additional detail. Also note whether the valve is a gate valve (a wheel handle), ball valve (a lever), or stopcock valve (a small knob), as each operates slightly differently.
How to Turn Off Your Main Water Shut Off Valve
Shutting off your main valve is simple once you find it, but the technique depends on the valve type.
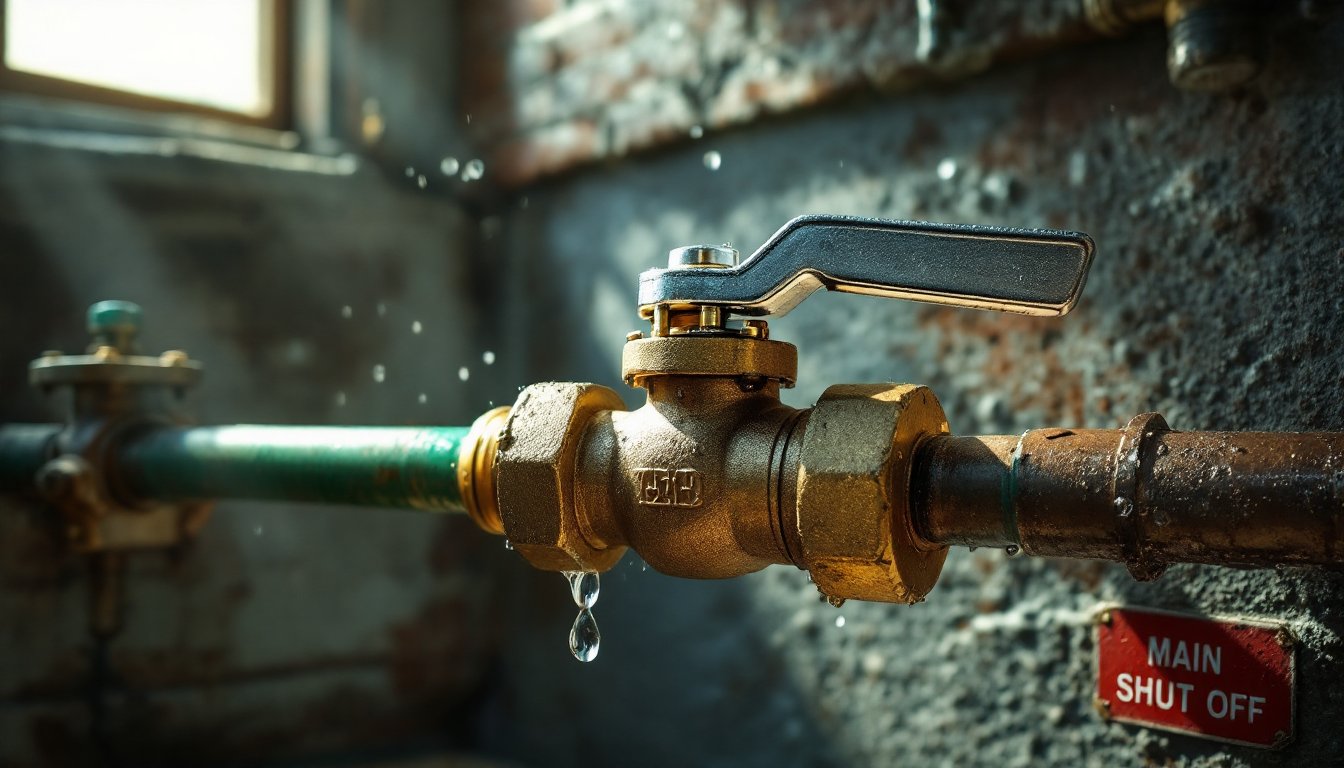
Ball valves (a common modern choice) have a lever handle. Turn the lever a quarter-turn until it’s perpendicular to the pipe. The valve closes when the lever is at a right angle to the flow direction. This design is quick and intuitive, no guesswork.
Gate valves (older homes and existing systems) have a round wheel handle. Rotate the wheel clockwise to close. Keep turning until you feel resistance, the valve stops naturally: don’t force it or you risk damaging it. Gate valves are less reliable over time because the gate seat can corrode, but they’re common in older plumbing.
Stopcock or compression valves (found in some homes) use a small knob or handle that turns clockwise to shut. These require more revolutions than ball valves and are becoming less common.
When you close the valve, water to the entire house stops. You may hear a rushing sound briefly as remaining pressure dissipates. To confirm the valve works, go to the lowest faucet in your house (usually a basement laundry or utility sink) and turn it on. No water should flow. If water still runs, the valve may be stuck, worn out, or backwards, in which case you’ll need professional help. This guide details the for reference.
Once you’ve confirmed the shut off works, label it clearly with a tag or bright paint. If you live in a rental, inform your landlord about its location. In an emergency, you won’t have time to search: speed is everything.
Maintaining Your Main Water Shut Off Valve
Your main shut off valve will sit unused for years, then fail exactly when you need it most, unless you maintain it.
Exercise the valve regularly. Every six months, locate it and turn the handle or wheel a full cycle: from fully open to fully closed and back to open. This keeps internal parts from freezing in place and prevents mineral buildup from sealing the valve shut. Spend 10 seconds on this task: it could save hours of emergency plumbing.
Check for leaks. If water drips from the valve body when it’s supposed to be closed, the internal seal is failing. A small drip now means a full failure later. Call a plumber to replace it, this isn’t a DIY repair unless you’re comfortable soldering or unthreading a main supply line.
Inspect the valve body for corrosion. Brass and copper valves can develop green or white crusty deposits. This is normal aging, but severe corrosion can affect operation. If the valve looks heavily corroded or the handle is stiff, have it evaluated.
Know when to replace it. If the valve leaks continuously, won’t turn without extreme force, or fails to shut off water flow, replacement is necessary. Modern ball valves are more reliable than older gate valves, so if you’re replacing an old gate valve, upgrade to a ball valve. This job requires shutting off water at the meter or having the city shut it off for you, so call a licensed plumber unless you have soldering or compression fitting experience.
Keep the shut off location accessible. Don’t pile storage boxes, equipment, or landscaping around your valve box or basement entry. In an emergency, you need fast access. The article explaining where offers additional best practices.
Conclusion
Your main water shut off valve isn’t flashy or fun to think about, but it’s one of the most important safety features in your home. Spend 15 minutes this week finding yours, confirming it works, and labeling it. Practice turning it off and on. Share its location with family members and emergency contacts. When a pipe bursts or a water heater fails, you’ll be grateful you did.